Up until August 1st if you had 2 vNets in the same Azure region (USWest for example) you needed to create a site to site VPN between them in order for the VMs within each vNet to be able to see each other. I’m happy to report that this is no longer the case (it is still the default configuration). On August 1st, 2016 Microsoft released a new version of the Azure portal which allows you to enable vNet peering between vNets within an account.
Now this feature is in public preview (aka. Beta) so you have to turn it on, which is done through Azure PowerShell. Thankfully it uses the Register-AzureRmProviderFeature cmdlet so you don’t need to have the newest Azure PowerShell installed, just something fairly recent (I have 1.0.7 installed). To enable the feature just request to be included in the beta like so (don’t forget to login with add-AzureRmAccount and then select-AzureRmSubscription).
Register-AzureRmProviderFeature -FeatureName AllowVnetPeering -ProviderNamespace Microsoft.Network –force
Now this “should” register you pretty quickly, but it took about an hour before I was able to actually setup a peer. The first step is to check and see if you are registered or registering by using the script below. If this says Registering then you have to wait. If it says Registered then you should be good to go. If you show as Registered and still get hours give it an hour then try again.
Get-AzureRmProviderFeature -FeatureName AllowVnetPeering -ProviderNamespace Microsoft.Network
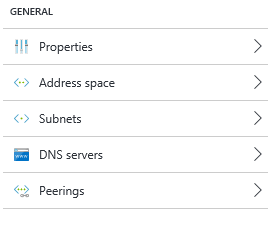
To actually setup the peering you have to specify which vNets are allowed to talk to which other vNets. The easiest way to do this is in the Azure Portal (unless you have a bunch to do then use PowerShell). Log into the portal and navigate to your Virtual Networks. In the properties of the vNet you’ll see a new option called “Peerings”.

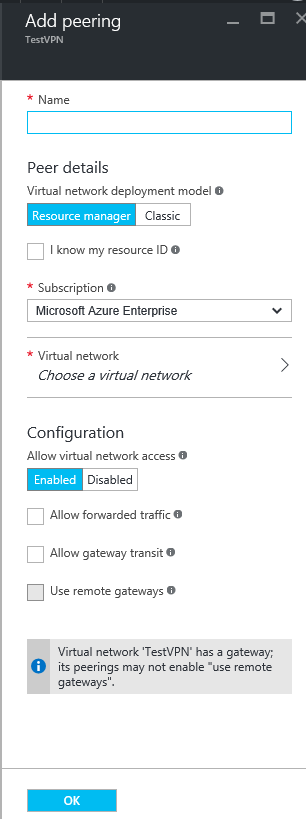
Select this and click the “Add” button. Which will get you the new peering menu shown below.
 Give the peer a name (I used the name of the vNet that I was connecting to), specify if the peering is to an RM or Classic vNet (yes you read that correctly, Classic is supported, do a degree) the subscription and the vNet that you want to connect to. You can then enable and disable access to the vNet over the peer, and specify if the peer connection should allow forwarded traffic (from a site to site VPN for example) and if this peer should be allowed to use this vNets Gateway (if it has one). If the vNet you’re configuring doesn’t have a remote network gateway, you can check that bottom button to use the gateway of the remote vNet instead. Once that’s done click OK, then setup the same peering on the remove vNet. Give it a minute or two for the deployments to complete, then you should have full private IP communications between the two vNets.
Now there’s a couple of restrictions to keep in mind.
- This only works across vNets in the same account.
- This only works across vNets in the same region, so vNets in different regions will still need to have a site to site VPN, but you only really need to have a single vNet in each region with a site to site VPN.
- Classic is supported, sort of. Classic vNets can ONLY peer to RM vNets, no Classic to Classic peering is supported.
That seems to be about it, or at least all I’ve run across.
Personally I think that this feature is fantastic, and it looks like it’ll solve one of my client’s issues that we’ve been working on for about a week now. I can’t wait to dive into it more and really push the limits.
Denny
Update: It appears that there’s a bug in the backend of Azure that’s preventing people from getting setup for the service. For the time being you have to run a second PowerShell command after the AllowVnetPeering command above. After that command is finished run the following command if the feature isn’t working for you. That should kick it into working.
Register-AzureRmResourceProvider -ProviderNamespace Microsoft.Network
The post Site to Site VPNs no longer needed for vNets in the same Azure region appeared first on SQL Server with Mr. Denny.
